


Middleware in Laravel 12 is a powerful mechanism for filtering HTTP requests entering your application. It allows you to inspect, modify, or reject requests before they reach your application logic or after a response is generated. This guide will walk you through the key features of Laravel 12 middleware, how to create and configure them, and provide practical examples, step by step.
- Authentication: Ensuring users are logged in.
- Authorization: Checking user permissions or roles.
- Logging: Recording request details.
- Rate Limiting: Restricting the number of requests.
- Request Modification: Adding or validating headers, parameters, etc.
In Laravel 12, middleware configuration has been streamlined, moving from the app/Http/Kernel.php file (used in Laravel 10 and earlier) to the bootstrap/app.php file, offering a more centralized and functional approach.
Step 1: Creating a Middleware
Laravel provides an Artisan command to generate a middleware class.
1. Run the Artisan Command: Open your terminal and run:
php artisan make:middleware CheckRole
This creates a new middleware class named CheckRole in the app/Http/Middleware directory.
2. Examine the Generated Middleware: Open app/Http/Middleware/CheckRole.php. The default structure looks like this:
<?php

namespace App\Http\Middleware;

use Closure;
use Illuminate\Http\Request;
use Symfony\Component\HttpFoundation\Response;

class CheckRole
{
    /**
     * Handle an incoming request.
     *
     * @param  \Closure(\Illuminate\Http\Request)
     */
    public function handle(Request $request, Closure $next): Response
    {
        return $next($request);
    }
}
The handle method is where you define the middleware logic. It receives the incoming $request, a $next closure to pass the request to the next middleware or controller, and optional parameters.
3. Add Custom Logic: Modify the CheckRole middleware to check if the authenticated user has a specific role (e.g., ‘admin’). If not, redirect them.
<?php
namespace App\Http\Middleware;

use Closure;
use Illuminate\Http\Request;
use Symfony\Component\HttpFoundation\Response;

class CheckRole
{
    public function handle(Request $request, Closure $next, string $role)
    {
        if (!$request->user() || !$request->user()->hasRole($role)) {
            return redirect('/home')->with('error', 'Unauthorized access.');
        }
        return $next($request);
    }
}
- This middleware accepts a $role parameter to check if the user has the specified role.
- If the user is not authenticated or lacks the role, they are redirected to /home with an error message.
Step 2: Registering Middleware
In Laravel 12, middleware is registered in the bootstrap/app.php file, unlike earlier versions that used app/Http/Kernel.php.
1. Register as Global Middleware: Global middleware runs on every HTTP request. To register CheckRole globally, edit bootstrap/app.php:
<?php
use Illuminate\Foundation\Application;
use Illuminate\Foundation\Configuration\Exceptions;
use Illuminate\Foundation\Configuration\Middleware;
use App\Http\Middleware\CheckRole;

return Application::configure(basePath: dirname(__DIR__))
    ->withRouting(
        web: __DIR__.'/../routes/web.php',
        commands: __DIR__.'/../routes/console.php',
        health: '/up',
    )
    ->withMiddleware(function (Middleware $middleware) {
        $middleware->append(CheckRole::class);
    })
    ->withExceptions(function (Exceptions $exceptions) {
        //
    })->create();
- The append method adds the middleware to the end of the global middleware stack. Use prepend to add it to the beginning.
2. Register as Route Middleware with an Aliase: To apply middleware to specific routes or groups, assign an alias in bootstrap/app.php:
->withMiddleware(function (Middleware $middleware) {
    $middleware->alias([
        'checkRole' => CheckRole::class,
    ]);
})
3. Register as Group Middleware: Sometimes you may want to group several middleware under a single key to make them easier to assign to routes. You may accomplish this using the appendToGroup method within your application's bootstrap/app.php file:
->withMiddleware(function (Middleware $middleware) {
    $middleware->appendToGroup('web', [
        CheckRole::class,
        AnotherMiddleware::class
    ]);

    $middleware->prependToGroup('group-name', [
        First::class,
        Second::class,
    ]);
});
Step 3: Applying Middleware to Routes
Middleware can be applied to individual routes or route groups.
1. If you would like to assign middleware to specific routes, you may invoke the middleware method when defining the route:
with parameter:
use Illuminate\Support\Facades\Route;

Route::get('/admin', function () {
    return 'Welcome to the Admin Dashboard!';
})->middleware(CheckRole::class.':admin');

use Illuminate\Support\Facades\Route;

Route::get('/admin', function () {
    return 'Welcome to the Admin Dashboard!';
})->middleware('checkRole:admin');
2. Apply to a Route Group: Group multiple routes under the same middleware:
Route::middleware(['checkRole:admin'])->group(function () {
    Route::prefix('admin')->group(function () {
        Route::get('/', function () {
            return 'Admin Dashboard';
        });
        Route::get('/settings', function () {
            return 'Admin Settings';
        });
    });
});
3. Middleware groups may be assigned to routes and controller actions using the same syntax as individual middleware:
Route::get('/', function () {
    // ...
})->middleware('group-name');

Route::middleware(['group-name'])->group(function () {
    // ...
});
Step 4: Excluding Middleware
When applying middleware to a route group, you may sometimes need to exclude a particular route from that middleware stack. Laravel provides the withoutMiddleware method to achieve this.
Route::middleware([CheckRole::class . ':admin'])->group(function () {
    Route::get('/', function () {
        ....
    })->withoutMiddleware([CheckRole::class]);

    Route::get('/admin', function () {
        ....
    })
});
Step 5: Controlling Middleware Execution Order
Laravel 12 allows you to specify the execution order of middleware using the priority method in bootstrap/app.php.
1. Set Middleware Priority:
->withMiddleware(function (Middleware $middleware) {
    $middleware->priority([
        ImportantFirstMiddleware::class,
        CheckRole::class,
        AnotherMiddleware::class,
    ]);
})
- Middleware listed in the priority array executes in the specified order, regardless of how they are assigned to routes.
Step 5: Real-World Examples
Here are additional middleware examples for common use cases:
1. Logging Middleware:
Purpose: Logging middleware captures details about incoming HTTP requests (e.g., URL, method, IP address) and logs them for debugging, monitoring, or auditing purposes.
<?php
namespace App\Http\Middleware;

use Closure;
use Illuminate\Http\Request;
use Symfony\Component\HttpFoundation\Response;
use Illuminate\Support\Facades\Log;

class LogRequest
{
    public function handle(Request $request, Closure $next): Response
    {
        Log::channel("request")->info('Request log', [
            'url' => $request->url(),
            'method' => $request->method(),
            'ip' => $request->ip(),
        ]);

        return $next($request);
    }
}
Register in bootstrap/app.php:
->withMiddleware(function (Middleware $middleware) {
    $middleware->append(LogRequest::class);
});
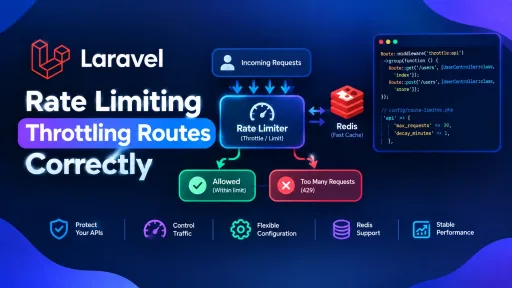
2. Rate Limiting Middleware: Use Laravel’s built-in throttle middleware to limit API requests:
Route::middleware('throttle:60,1')->group(function () {
    Route::get('/api/users', function () {
        return ['data' => 'User list'];
    });
});
3. Custom Header Middleware: Add a custom header to responses:
<?php

namespace App\Http\Middleware;

use Closure;
use Illuminate\Http\Request;

class ApiVersionMiddleware
{
    /**
     * Handle an incoming request.
     *
     * @param Request
     * @param Closure $next
     * @param string $version
     */
    public function handle(Request $request, Closure $next, string $version)
    {
        // Set the API version in config
        config(['app.api_version' => $version]);

        return $next($request)->header('X-API-Version', $version);
    }
}
Register and apply as needed.
Best Practices
- Single Responsibility: Each middleware should handle one specific task (e.g., authentication, logging).
- Avoid Overuse: Use middleware for cross-cutting concerns, not business logic better suited for controllers or services.
- Test Thoroughly: Write tests to cover middleware behavior under different conditions.
- Use Aliases: Assign short, readable aliases for middleware to keep route definitions clean.
- Document Parameters: If your middleware accepts parameters, document their purpose clearly.
Conclusion
Middleware in Laravel 12 provides a robust and flexible way to manage HTTP requests and responses. By following this guide, you can create, register, and apply custom middleware, leverage built-in middleware, and control execution order to build secure and maintainable applications. The examples provided (e.g., CheckRole, LogAfterResponse, AddCustomHeader) demonstrate practical use cases, and testing ensures reliability.
If you found this helpful, feel free to share or drop a comment. Happy coding with Laravel! 🧱✨
Free resources for this topic
Code snippets and fixes for this topic
Get one practical tip every week
New tutorials, fixes and free cheat sheets from DEV Talk, straight to your inbox. No spam, unsubscribe in one click.
Free download: Laravel interview questions (PDF)
Have a question about this post?
Ask the community: other developers and the author can answer.
Get notified about new articles
One click, no email needed. Turn it off anytime with the bell at the top.
Get new articles on your iPhone
Add DEV Talk to your Home Screen, open it, then tap the bell.
Enjoying the content?
If this article helped you, you can support the author with a coffee. It keeps new posts coming.


Comments 0
No comments yet
Be the first to share your thoughts.